Pumpkin Cheesecake
Tired of Pumpkin Pie? Make a Pumpkin Cheesecake. This rich and satisfying dessert will feed a crowd. No last minute fussing either. This is one you must make the day before serving. Or if you are really the plan ahead type, you can make it, bake it, cool it, wrap it up tight as a drum in plastic wrap and freeze it for up to two months. Thaw it overnight in your refrigerator.
I extend warmest thanks to Carolyn Thacker, cooking teacher par excellence, for this recipe. With grace, humor and selfless generosity she imparted her knowledge of cookery to me. I have made this cheesecake of hers for almost thirty years, making a change here and an addition there, but always holding true to Carolyn’s plan. Thanks, Carolyn for this recipe and so many others, and for the great times and all the laughs.
Pumpkin Cheesecake
makes 1 nine inch cheesecake
To avoid lumps in the filling all ingredients must be at room temperature and thoroughly combined. Do not overbeat the batter or the top might crack.
For the crust
1 1/4 cups finely chopped pecans
1/4 cup dry bread crumbs (see Food Nerd Notes, below)
1 teaspoon cinnamon
2 tablespoons granulated sugar
2 tablespoons plus 2 teaspoons unsalted butter, divided
For the filling
2 pounds Philadelphia Brand Cream Cheese, at room temperature
1/4 cup brandy
1 cup canned pumpkin
1 1/2 cups brown sugar, lightly packed
1/3 cup granulated sugar
2 teaspoons cinnamon
1 teaspoon ground ginger
1/2 teaspoon freshly grated nutmeg
1/4 teaspoon ground cloves
1/4 teaspoon ground mace
3 large eggs, room temperature
2 large egg yolks, room temperature
1 teaspoon vanilla
For the whipped cream
1 cup heavy cream
1 tablespoon granulated sugar
1 teaspoon cinnamon
Make the crust
Place rack in center of oven. Preheat to 350 degrees F. Coat bottom and sides of 9 inch springform pan with 2 teaspoons butter. Set aside
Combine pecans, bread crumbs, cinnamon and granulated sugar in medium bowl. Drizzle melted butter over. Toss to combine and coat evenly. Press mixture into bottom and 1/4 to ½ inches up sides of pan. Refrigerate 10 minutes. Transfer to sheet pan (crust may exude a bit of butter as it bakes) and bake 10 minutes. Cool on wire rack.
Make filling and bake
Adjust oven rack to center. Preheat oven to 300 degrees F.
Combine sugars and spices in small bowl and set aside.
Fit standing mixer with paddle. Cut cream cheese into inch chunks and drop in mixing bowl. Beat on low speed until smooth, scraping bowl several times.
Add pumpkin and brandy, continuing to beat until mixture is homogenous. Add sugar and spice mixture in three additions, blending well after each addition.
Lightly beat eggs, egg yolks and vanilla. Add eggs in four additions, scraping sides and bottom of bowl occasionally. Pour into cooled crust and tilt pan to settle batter. Smooth surface.
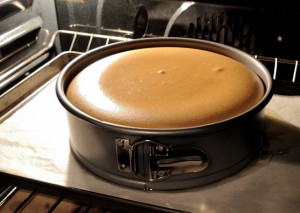
Place on sheet pan (to catch any liquid that might leak) and bake on middle rack of oven until center is just set, about 1 hour 30 minutes. Turn oven off. Prop oven door open and leave cheesecake in oven 30 minutes more.
Remove and place on wire rack to cool completely, about 4 hours.
Refrigerate uncovered 10 hours or overnight. Cover very loosely with plastic wrap and refrigerate until ready to serve.
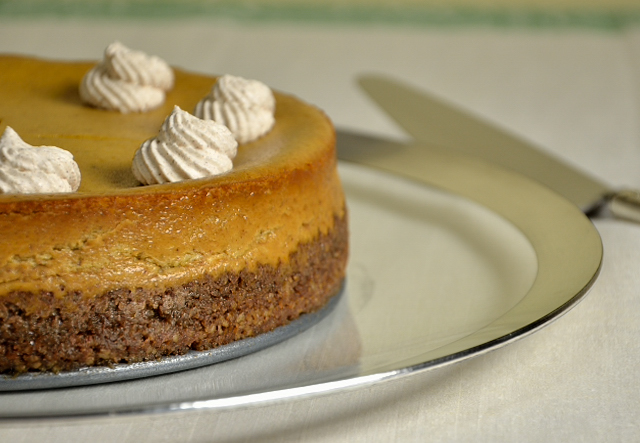
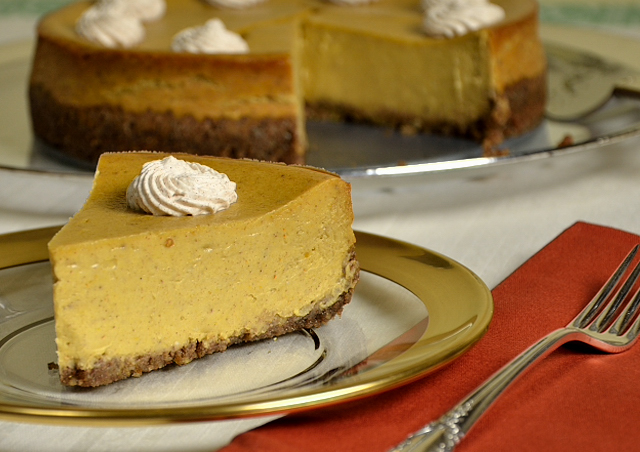
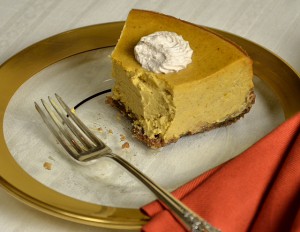
Remove cheesecake from refrigerator 20 minutes before you plan to serve it. Whip the cream with sugar and cinnamon. Pipe rosettes around outer edge of cheesecake or serve slices with a dollop of the cream.
Food Nerd Notes:
Make your own bread crumbs. It is a simple process, and they are far superior to anything you can buy. Start with a good egg bread or a white sandwich bread. Preheat oven to 300 degrees F. and adjust rack to middle position. Trim and discard crusts. Cut bread slices into quarters or if you are using a loaf, into ½ inch chunks. Place in workbowl of food processor fitted with metal knife and process until finely ground. Spread crumbs on rimmed sheet pan and place in preheated oven to dry, about 10 to 12 minutes. Using a fork, stir 3 or 4 times, moving the crumbs around to promote even drying and prevent browning. Store in airtight jar.
If you have a recipe that calls for fresh bread crumbs, prepare the bread as above, and grind it finely in the processor, omitting the oven step.
One last thought – for years I used an old style aluminum springform pan. I just purchased the Calphalon non-stick version, and it is great. The latch opens and closes with ease. The pan heats evenly, does not buckle or warp and is truly non-stick. I wish I had bought it years ago. It is available from Amazon and cookware stores everywhere.
UPDATE:
I have made this cheesecake seven times this week. No jive. The last two times I used a water bath. The result was a revelation. Some cooks swear by this method, while others swear by the dry heat method described in the main recipe above. Each baking technique produces a very different result. The dry heat method produces the classic rich cheesecake, dense with a firm set, and the occasional crack on the top (most often the result of overzealous beating of the eggs.) The water bath method, with its gentle moist heat, insulates the cake from the dry heat and produces a tender, remarkably smooth custard-like cake.
The two methods produce very different visual results. The dry heat cake is browned, raised around the perimeter and the edges of the pecan crust are caramelized – my favorite part to cannibalize. The water bath cheesecake, on the other hand has a top as smooth and flat as glass, and sides that are neatly baked, but lacks caramelization at the crust edges. The water bath cheesecake simply never cracks. Period.
Wondering how to use a springform pan in a water bath? No hassle. I used a Turkey Size Reynolds Oven Bag. I placed the pan with the cooled crust down into the bag, and for double protection, I used Reynolds Wrap Heavy Duty aluminum foil to tightly wrap the pan. I trimmed both the foil and the Oven Bag to just above the level of the top of the pan and crimped them together.
Next up was the water bath, also known as a bain marie, a classic cookery technique that ought to be in every cook’s repertoire. I placed the prepared springform pan in a large roasting pan and filled the springform pan with the prepared batter. I poured boiling water into the roasting pan to a level half way up the side of the cheesecake pan, taking care not to splash any into the filled springform pan. I VERY carefully transferred the whole shebang to the middle rack of the oven, slid it in and baked exactly as for the dry heat method at 300 degrees F. until center was just set, about 1 hour 30 minutes. I turned the oven off, propped the oven door open and left the cheesecake in the oven 30 minutes more.
Take your pick of which method you prefer – but you’ll have to experiment!
My kitchen experimentation, it would seem, never ends. It is my pleasure to share it with you.
Note: You can click on any picture for a larger image, and to see a slide show!
I have no affiliation with any product, manufacturer, or site mentioned in this article.


Tuesday, November 20th 2012 at 8:09 pm |
Adri – Your cheesecake looks like a keeper – obviously it is if you’ve made it decade after decade. I delegated dessert this year to others, but if it were up to me, they’d be bringing this beauty. Assistant Bart’s photos are beyond gorgeous.Happy Thanksgiving to you both and I’m so grateful we are blogging buddies.
Tuesday, November 20th 2012 at 9:00 pm |
Hi Linda,
Yes, this one has been in my repertoire for a long time. I will pass your compliments on to Assistant Bart. I hope you have a wonderful Thanksgiving. Blogging buddies! Great name. Great fun!
Tuesday, November 20th 2012 at 9:24 pm |
Adri, your pumpkin cheesecake looks deliciuos. I will certainly try this recipe. I love pumpkin pie so I developed my Italian version of your American pumpkin pie. I add some crushed amaretti cookies to the filling and use Italian panna da cucina (very dense cream). Happy Thanksgiving!!! Paola
Tuesday, November 20th 2012 at 9:54 pm |
Thank you, Paola. I would LOVE to see your Pumpkin Pie. I always enjoy amaretti, either alone or in desserts or crumbled into savories. So let’s see that recipe! I hope you have a wonderful holiday.
Wednesday, November 21st 2012 at 7:44 am |
Looks so good I want to eat the photo
Wednesday, November 21st 2012 at 5:36 pm |
Thanks, Anthony! And Happy Thanksgiving to you.
Thursday, November 22nd 2012 at 11:33 am |
ADRI,
This will be a BIG hit. Emily LOVES pumpkin cheesecake. As always, we love reading your posts! Keep ’em coming!
Happy Thanksgiving to you and yours!
Love,
Janet
Thursday, November 22nd 2012 at 12:10 pm |
Hi Janet,
Excellent! I am glad to hear she is a fan – I always knew I liked that kid. This one has been a fave here ever since I first made it. Happy Thanksgiving to all!
Thursday, November 22nd 2012 at 1:08 pm |
HAPPY THANKSGIVING ADRI! That pumpkin cheesecake looks marvelous and I am going to try it on Sunday. Today is not a holiday in Italy so I had to work, but my family is invited to a better-late-than-never Thanksgiving dinner at an American friend’s house on Sunday and I must bring this beautiful pumpkin cheescake! Thank you for sharing this recipe!
Thursday, November 22nd 2012 at 4:24 pm |
And Happy Thanksgiving to you and yours! I hope you and your friends have a wonderful celebration, and I hope you enjoy the Pumpkin Cheesecake!
Sunday, November 25th 2012 at 8:15 am |
Yes. I’m tired to death of pumkin pie. Thank you for upping the ante! GREGp
Sunday, November 25th 2012 at 8:52 am |
Hi Greg,
You are quite welcome. It was all in on this one – I could not resist setting it proudly on a Dorothy Thorpe silver band platter and serving it on Dorothy Thorpe gold band plates.
Saturday, November 23rd 2013 at 8:51 pm |
Adri, my mouth is watering, please pass me a fork! I love the water bath method. Delicious recipe and very informative. Thanks!
Saturday, November 23rd 2013 at 9:02 pm |
Hi Liz,
I’m glad you like this one. The water bath method works beautifully. Thanks for stopping by!
Wednesday, February 11th 2015 at 5:51 am |
Wonderful recipe! And thank you for confirming my thought that a turkey bag would work for a bain marie….I have been afraid to try this method using the extra wide aluminum foil as I appreciate how hard it is to keep water away from that wonderful crusty bottom Now I can happily bain marie method my next cheesecake!
Wednesday, February 11th 2015 at 8:24 pm |
Hi Jenn,
Thank you so much. Yes indeed the turkey bag works like a charm – no more worries about water seeping into the pan. Isn’t it disappointing to make a cheesecake only to have it ruined by a leak. I am so pleased that you visited my site, and I appreciate your taking a moment to leave a comment. I hope your new year is off to a rousing start!