Pasta Fazool. Pasta Fazoo. Pasta fa Zuole. Pasta e Fagioli. Italians call it a lot of things. My dad, Bill Crocetti, called it delizioso. He used to make his own. Nope, this dish was not entrusted to my mother. Uh uh. Funny how you can want a dish just so. That is when you have to make it yourself. So at the stove stood my dad cooking up a memory of his childhood. Now, as an adult I understand the contented look on his face as he breathed in the perfume of the garlic cooking in the olive oil, his olfactory senses transporting him back to his childhood kitchen over his father’s barbershop in Steubenville, Ohio. That is how it was for my dad where Pasta e Fagioli was concerned. As far as I can remember it was all his, start to finish. To me as a kid, I thought it an odd, unattractive dish. The garlic, the oil, the parsley, the tiny little pasta, I wanted something red in there. Give me tomatoes, Daddy, please! Well, then it would not have been his Pasta Fazool. Yes, it is that simple. Again the tradition of mille nonne, a thousand grandmothers, is at work. No two families make it the same way. Period. Some cooks use crushed or canned tomatoes in their Pasta e Fagioli – in the heart of the Mezzogiorno the broth is kissed with a dollop of tomato paste giving it a slightly pinkish hue. My dad preferred just a bit of pasta water, so little it was not a soup, but rather a hearty bean and pasta dish. Even within my dad’s family there were variations. His brother preferred a version more akin to a soup with a tomato base. Not so my father. It was beans and pasta. Pasta Fazool. That’s what he called it, and that is what it was. And the pasta, well that depended on what was in the cupboard. It could be ditalini, maybe elbow macaroni, maybe orecchiette, maybe tubetti. It was cucina d’opportunita – use what you have. Another of his specialties was Spaghetti Aglio e Olio, Spaghetti with Garlic and Oil. This is simple food straight from the south of Italy, and along with dishes like Pasta e Fagioli and Cacio e Pepe, is man food, the kind of dishes men cooked up when left by themselves. My dad’s Aglio e Olio was classic. He poured olive oil into a frying pan. (We never called it a skillet and certainly not a saute pan. We’re talking the fifties here.) He sliced the garlic, lots of it, tossed it in the pan and let the whole thing heat up, cooking the garlic just until it was golden, the oil shimmering around it. Meanwhile a pound of spaghetti cooked on the next burner. Just before the pasta was done, and the garlic was just golden, he carefully poured some of the pasta water into the frying pan and let it boil a bit. I always stood back because, boy, did it ever bubble up. A quick draining of the pasta and into the frying pan it went, along with the parsley. A bit of tossing, a bit more heat, lots of parmigiano, and he was ready to eat.
My dad was happy in front of the stove. He made all manner of delights including the best fried eggs, uove frittellate, ever. His secret? Butter. Lots of butter and a lid for the frying pan. He put a half stick of salted butter in a small but well used Revereware frying pan, let the butter get spitting hot and slid in the eggs. A little salt and pepper and he was on his way. The sweet smell of butter cooking filled the kitchen. To this day I still love that smell. The yolks retained their gorgeous deep yellow color while the whites were utterly transformed. Little bubbles formed and then burst around the edges of the whites leaving behind a network of crispy brown lace that gave his eggs a distinctive crunch. He took a peek at the underside of the eggs, and if it had begun to brown, that’s when he put the lid on. Yup. The lid went on. It trapped the steam in the pan and finished cooking those glorious eggs. Oh, how I used to love it when he fried eggs for the two of us.
 I was talking to my sister Toni the other day and the conversation turned to dad’s uove frittellate. Imagine my surprise as she spoke of the dish as though it were the sole province of her and dad. I thought it belonged to me and dad! Not until we had that conversation did I realize that he had ever made those eggs for anyone but me. He could make each of us feel like a princess while avoiding the trap of making the other daughter feel like a peasant. What a dad.
It was just so much fun to share food with him. Fried kidneys were our project from start to finish. No one else in our family was interested. Not in the least. They scattered, and we drove to the market together, asked the butcher for some kidneys and back home we came. The flavor and perfume of fried kidney is the rara avis of the culinary world. Unmistakable. I won’t attempt to describe it here. No one could do it better than James Joyce. But my dad was always able to make them without that je ne sais quoi Joyce so skillfully describes. I can still see the kidneys glistening in their wrapping, their burgundy fullness holding promise of delights to come. He sauteed them in butter, and I consumed them with gusto. And then one day I learned kidneys were “an organ,” and that was the end of the affair. In short order liver was also off my list. My dad, quite exasperated by my sudden refusal to eat organ meats asked my why. I replied “Because they are organs, Daddy. ” He looked at me and sternly said “Well, Adri a steak is a muscle.” Dead silence ensued. He realized he had made a fatal error. The very serious look on my face as I quietly ruminated on his pronouncement must have told him what was coming next. Adri, The Picky Eater was born, my gustatory adventures severely curtailed. As time went on, steak returned to my menu, but alas, kidneys never did. I bet my dad missed our kidney fests.
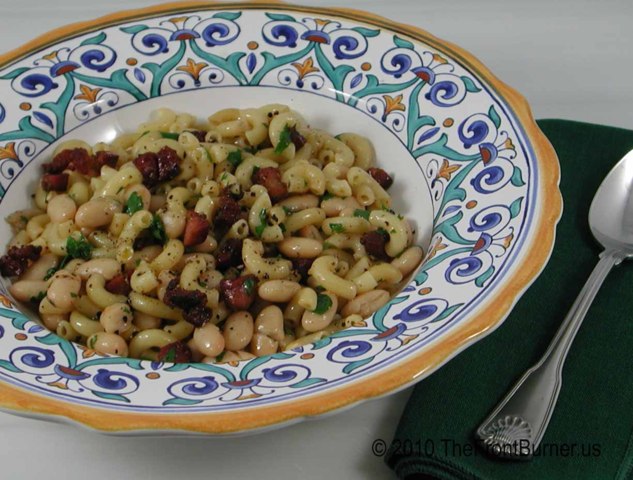
Pasta e Fagioli
1 15 oz. can cannellini beans, rinsed
1/4 pound small pasta, such as orecchiette, pennette, tubetti, or elbows
2 tablespoons olive oil, plus more to finish
3 oz. pancetta, diced
2 cloves garlic, minced
generous pinch oregano
pinch red pepper flakes
1/4 cup chopped parsley
Parmigiano
Drain and rinse the cannellini beans. Set aside.
Bring a large pot of water to the boil. When it comes to the boil, generously salt the water and add pasta.
Meanwhile, pour 2 tablespoons of olive oil into a large saute pan. Cook diced pancetta over medium heat until it is crispy and brown. Just a moment before the pancetta is done, reduce heat slightly, add garlic, oregano and red pepper. Saute very briefly, until fragrant.
Add beans, pasta and parsley to the saute pan, tossing gently to coat, adding pasta water, if necessary, to loosen the mixture.
Turn the mixture in to a serving bowl. If desired, toss with a tablespoon of olive oil. Serve immediately with Parmigiano or Romano.
How to cook spaghetti
For one pound of spaghetti, or other long pasta fill a stockpot, pasta pentola or other large cooking vessel with at least 6 quarts of water, and bring to a rapid boil. Once the water has come to the boil, add a generous dose of sea salt, about 1 teaspoon per quart of water. As the saying goes “The water should taste like the Mediterranean sea.” When the salt is added, the water will bubble up, so do exercise caution. The water will come off the boil, but will shortly return. Once the water has returned to the boil, add your pasta to the pot. Do not break it. As it softens, use a wooden spoon or other utensil to push it down into the pot. Again, the water will have come off the boil. Cover the pot until it returns to the boil. Once it has begun to boil again, uncover the pot, stirring occasionally, until just al dente. Remember, the manufacturer’s cooking guidelines are only suggestions; taste the pasta occasionally, being sure it is no longer white in the center and is the consistency you desire.
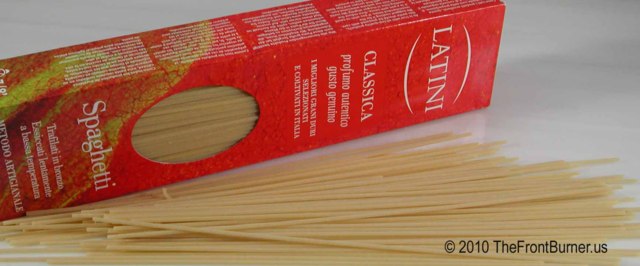
My favorite brands of dried pasta are Latini and Rustichella d’Abruzzo. They are premium products and can cost upwards of $6.00 for one pound of spaghetti. Pricey, for sure. For a more affordable and very good product I turn to Del Verde, De Cecco and Barilla.
Premium pastas such as Latini and Rustichella d’Abruzzo are set apart by their use of high quality wheat, in some cases heirloom strains, and the use of bronze dies in the extruding machines. The dies impart a uniquely rough texture to the pasta’s exterior. Because the rough exterior allows the pasta and sauce to bind so well, it is a particularly good conveyor of the taste of the olive oil, a key ingredient in Aglio e Olio. Use of the bronze dies coupled with low temperature, long drying times combine to make these artisan pastas unique. I can’t imagine what my dad would have thought of using such expensive pastas for these two supreme examples of cucina povera. But today these dishes have been elevated far beyond the level of cucina casareccia, home cooking. For that matter I can just see that wry smile of his were he to look at a menu from any of today’s tony Italian eateries and see Aglio Olio, Cacio e Pepe or Pasta e Fagioli listed. “Ain’t that a kick in the head,” he’d say.
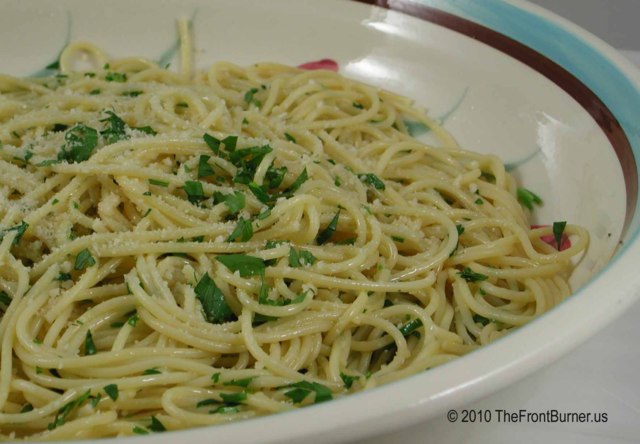
Spaghetti Aglio e Olio
Olive oil takes center stage here. Be sure to use a good quality oil whose taste you really like. And go ahead – splurge on Parmigiano Reggiano, the pride of Italy. The cheese is manufactured to exacting standards in the Italian provinces of Parma, Reggio Emilia, Modena, Mantua and Bologna. Milk from local cows, whose diet is also regulated is used to make the cheese. You can be sure you are getting the real thing by looking at the rind of the cheese and making sure you see Parmigiano Reggiano in a repeating pin dot pattern.
1 pound spaghetti
1/4 cup extra-virgin olive oil, plus more to finish
3 or 4 large garlic cloves, thinly sliced
1/4 to 1/3 cup chopped parsley, to taste
1 cup grated Parmigiano-Reggiano, plus more for the table
Bring a large pot of water to the boil. Generously salt the boiling water and drop the spaghetti in. Do not break the spaghetti.
Pour oil into a saute pan. Set pan over medium heat and add garlic. Cook it gently, being careful it does not scorch or burn. If it burns, you must discard the contents of your pan and begin again. There is no salvaging burned garlic.
When the garlic is golden, add a cup of pasta water and boil to reduce it a bit. Be careful, water into hot oil splatters. Just before the pasta is done cooking add all of it to the saute pan along with the parsley. Cook gently, a minute or two, until the pasta is done, adding more pasta water if necessary to form a sauce that coats all the pasta. If it is too dry add a bit of pasta water, if there is too much water, increase the heat and reduce until it is the desired consistency.
Remove pan from heat, add cheese and a bit of olive oil, toss and serve at once.
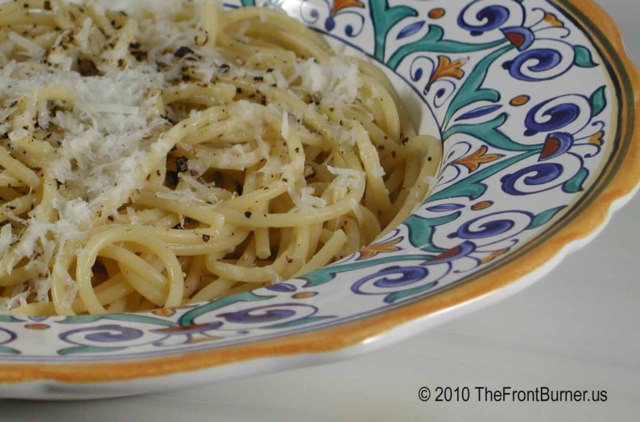
Spaghetti Cacio e Pepe
The assertive flavors of the Pecorino Romano and cracked peppercorns combine to make this simple dish greater than the sum of its parts. Pecorino is a ewe’s milk cheese (pecora is Italian for sheep), and is part of a group of cheeses formerly known as Cacio. It is lighter in color than other Italian grating cheeses, quite sharp and leans to the salty side. It is also one of the oldest cheeses produced in Italy.
1 pound spaghetti
1-2 tablespoons crushed black peppercorns
1 cup freshly grated Pecorino Romano, plus more for the table
Bring a large pot of water to the boil. Generously salt the boiling water and drop the spaghetti in. Do not break the spaghetti.
Meanwhile grind the peppercorns very coarsely. If you do not have a pepper grinder, crush the peppercorns with a saute pan, meat mallet or mortar and pestle.
Warm up a large pasta bowl. When the spaghetti is al dente, lift it from the pot, drain very briefly and put it in the warm pasta bowl. Quickly toss the pepper and 1 cup of cheese with the pasta, adding a bit of pasta water to help combine the ingredients.
Serve the pasta straightaway, with more cheese and pepper on the side.
Note: You can click on any picture to see a slide show!
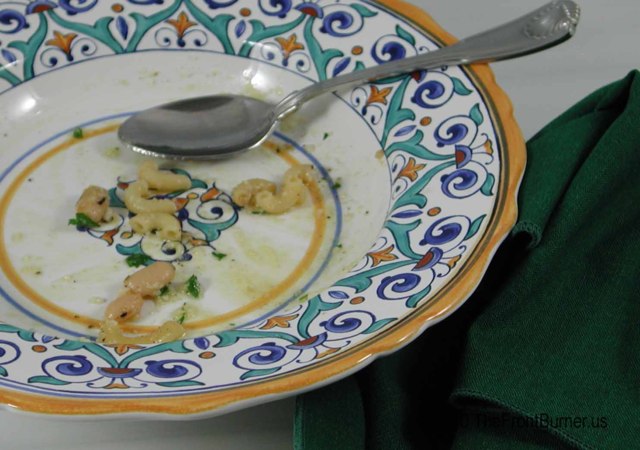
Pasta e Fagioli

Pasta Cacio e Pepe